Step 1: Setting Up The Document
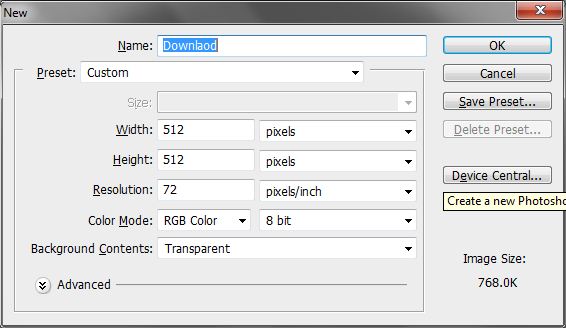
We’ll start with a canvas size of 512×512 pixel. Keep the background transparent. You can give it any title you want, I chose "Download" since it’s a download folder icon.
Fill (G) the first layer with
#e6e6e6 and name it
"Background" or
"BG".
Icon Resolutions
Icons have standard resolution going in a pattern like so 512×512, 256×256, 128×128… Each time it will be divided or multiplied by 2. OSX can support up to 512×512 but Windows can only support up to 256×256.
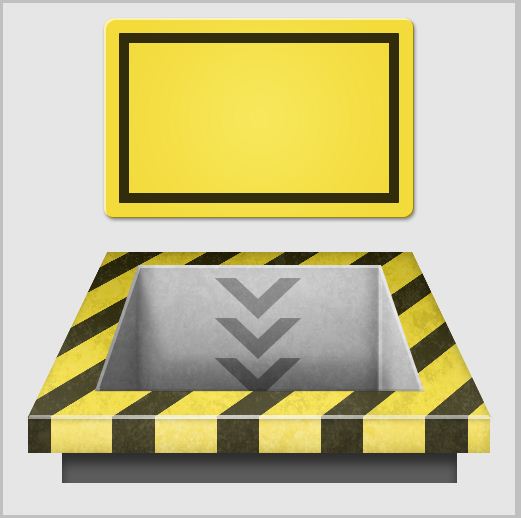
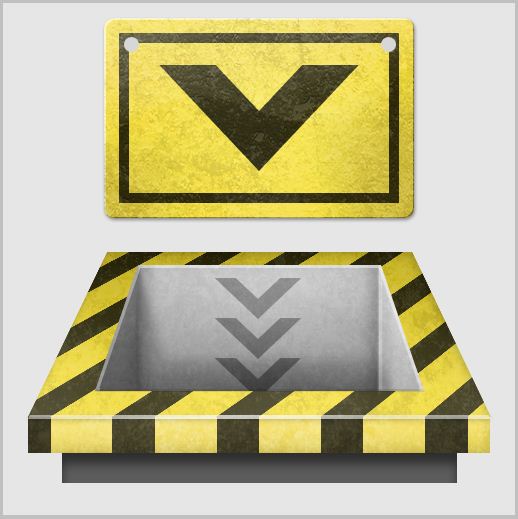
Step 2: Laying The Foundation
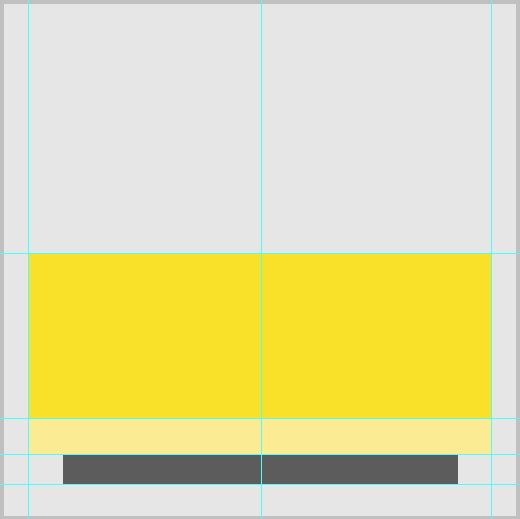
Let’s start by drawing important sections of the icon to make sure it fills the space well. Create two
groups called
"Top" and
"Bottom", placing
"Top" above the other. Create a
new layer inside
"Top" and draw a rectangle in the bottom two thirds of the canvas using the
Marquee Tool (M) and
Fill it with
#fae129. Name it
"Face" for reference later
. Center this layer by
ctrl+A and clicking on the
"Align horizontal center" button on the
Tools Options Bar while the
Move Tool (V) is active.
Create another layer inside the other group and draw a rectangle below the previous one and
Fill it with this color
#fbec93. Call this
"Front". Create a new layer below and call it
"Front Bottom". Draw a smaller rectangle below it with this color
#5c5c5c.
Once you’re done, it’s a good practice to place
guides at important areas. In this case it would be the edges of the drawing. Enable it by displaying
Rulers ctrl+R.
Guides and Marquee Tool
Using guides can help you easily snap your drawings to the same place every time so it becomes more consistent and efficient. Marquee Tool is great for icons because it helps to create crisp edges.
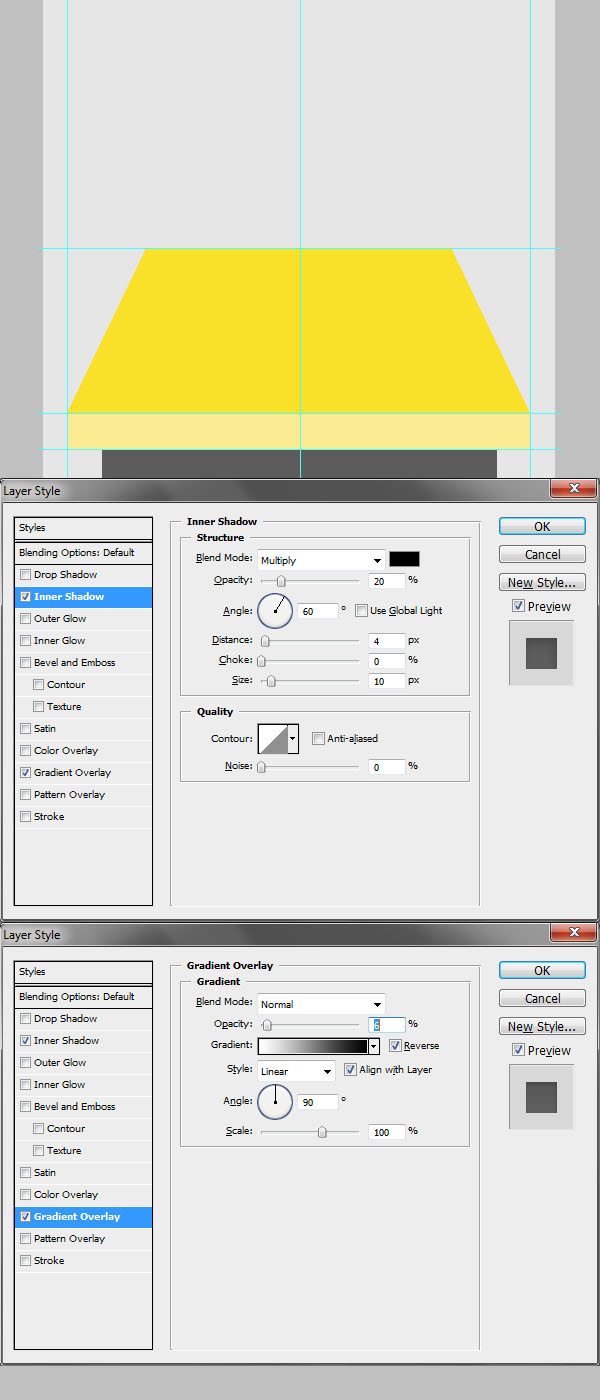
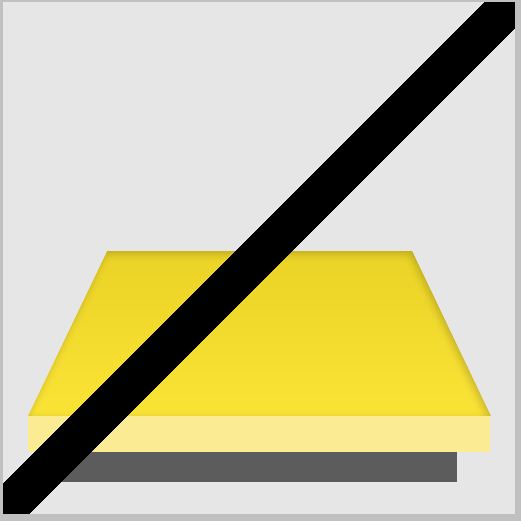
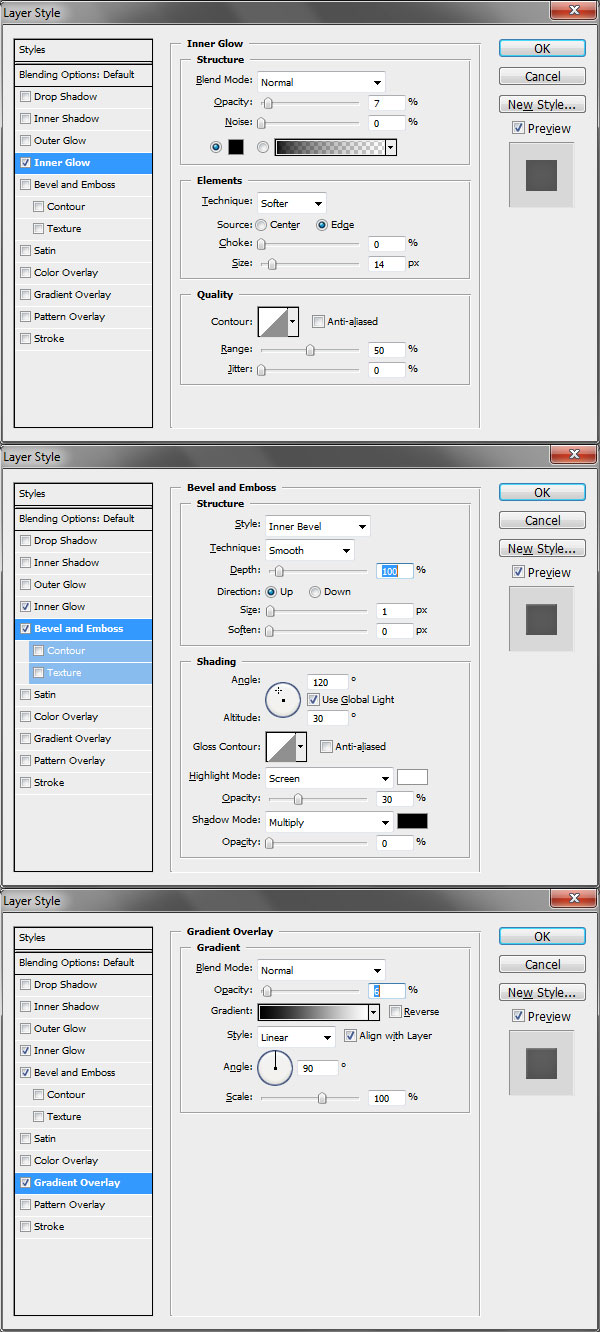
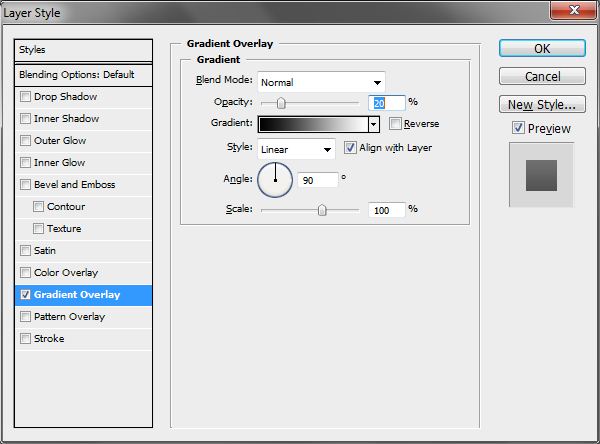
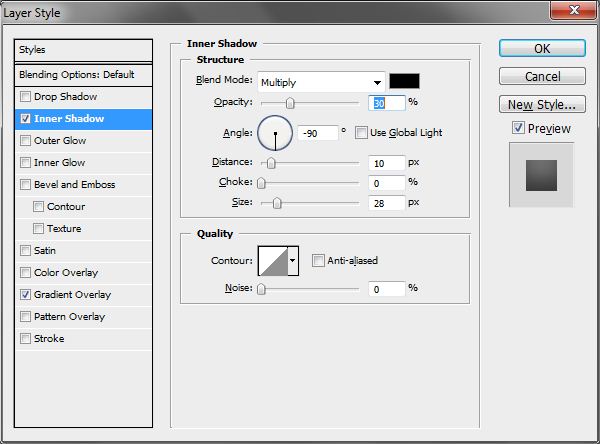
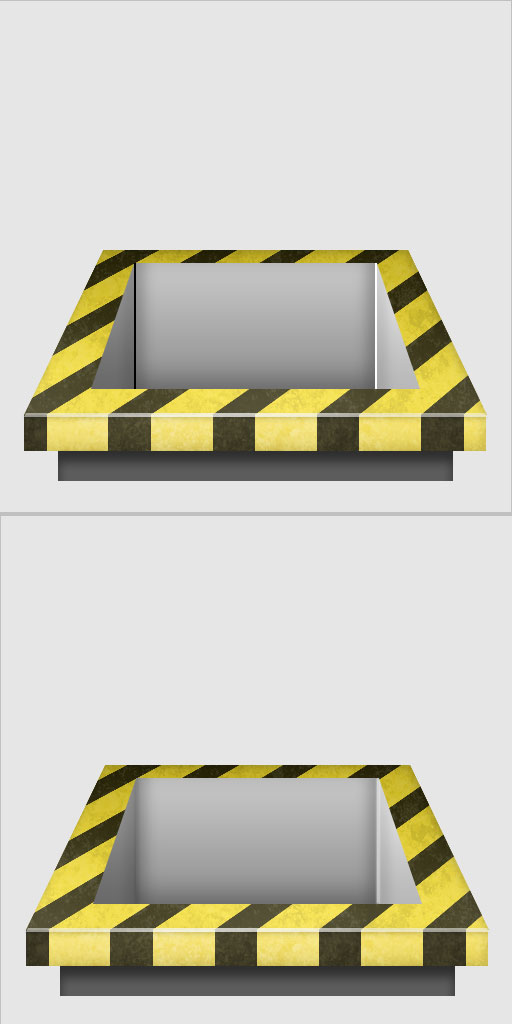
Step 3: Starting From The Top
Go to the
"Top" layer and enter
Free Transform ctrl+T >
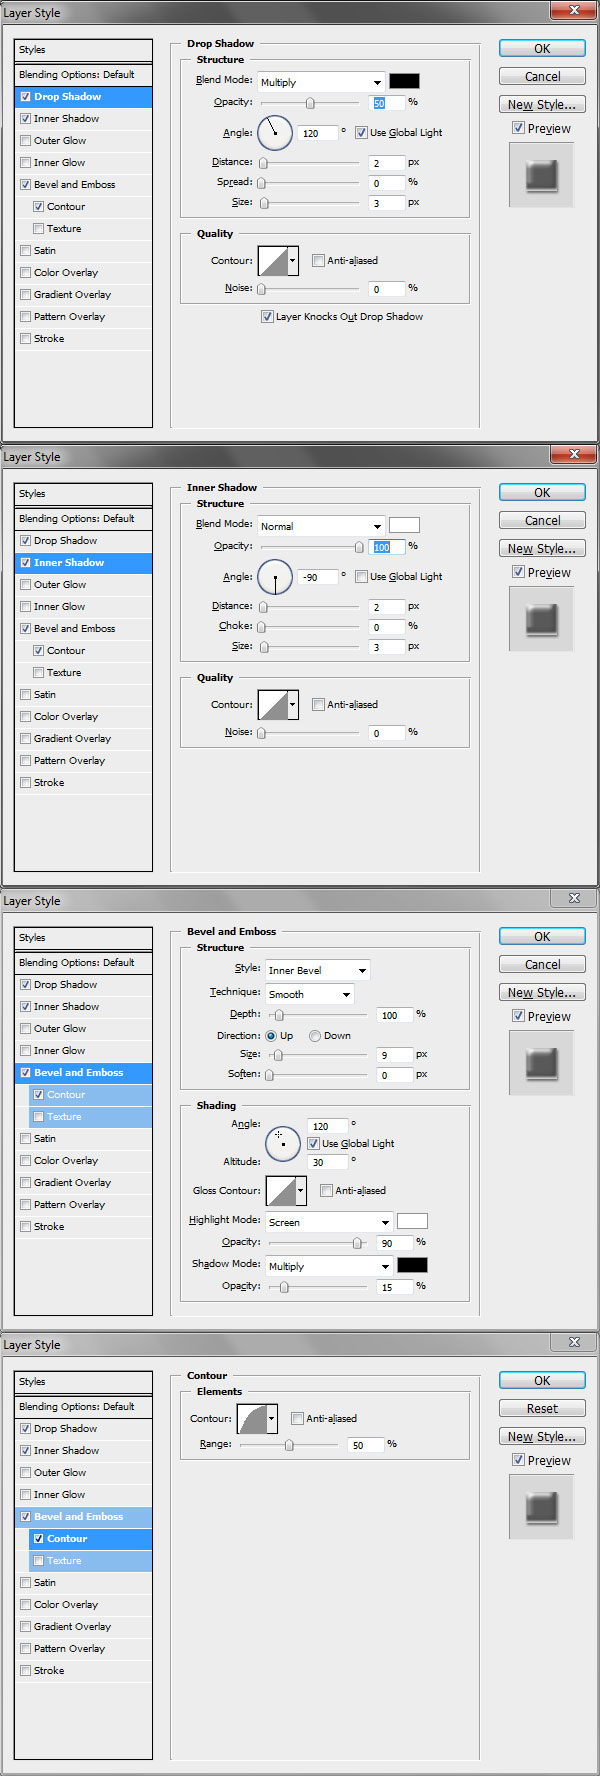
Perspective then drag the top corners in. Apply the
Layer Styles above.
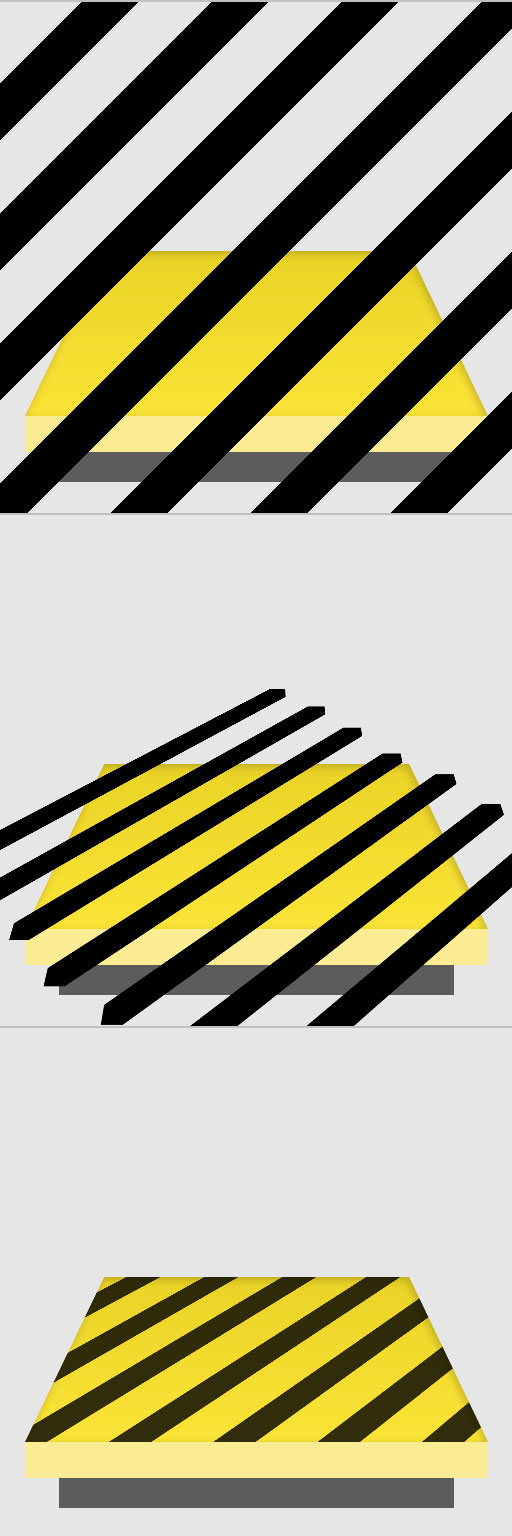
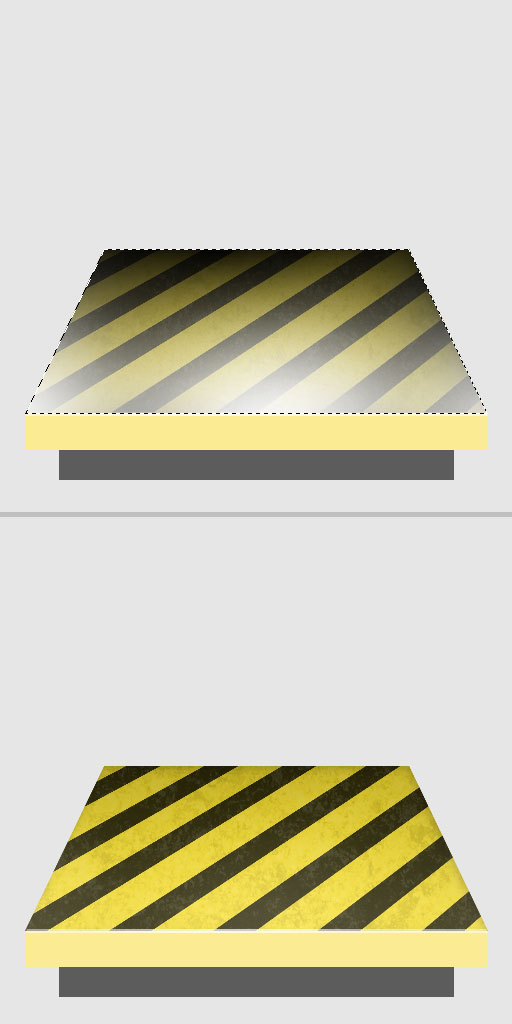
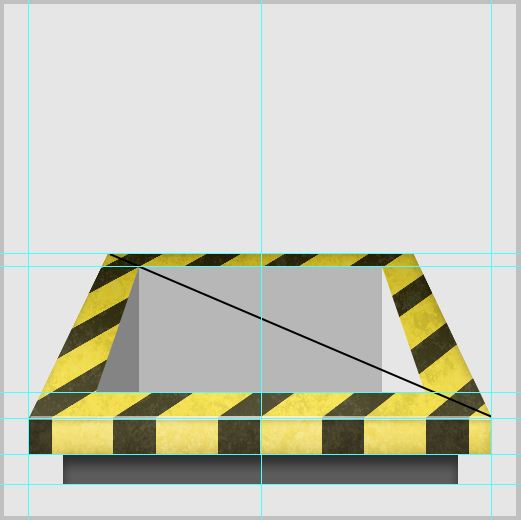
Step 4: Drawing Stripes
Use the
Line Tool (U) at
40px Weight to draw a diagonal line across the canvas. Then
Duplicate ctrl+J it and move it evenly to the side so that it forms the following pattern. Try to space them evenly by using
shift+arrow key, but it doesn’t matter that much. If you want to be precise, you can create a custom pattern (
not covered in this tutorial).
Enter
Free Transform and transform it, like below, by
scaling and using
Perspective.
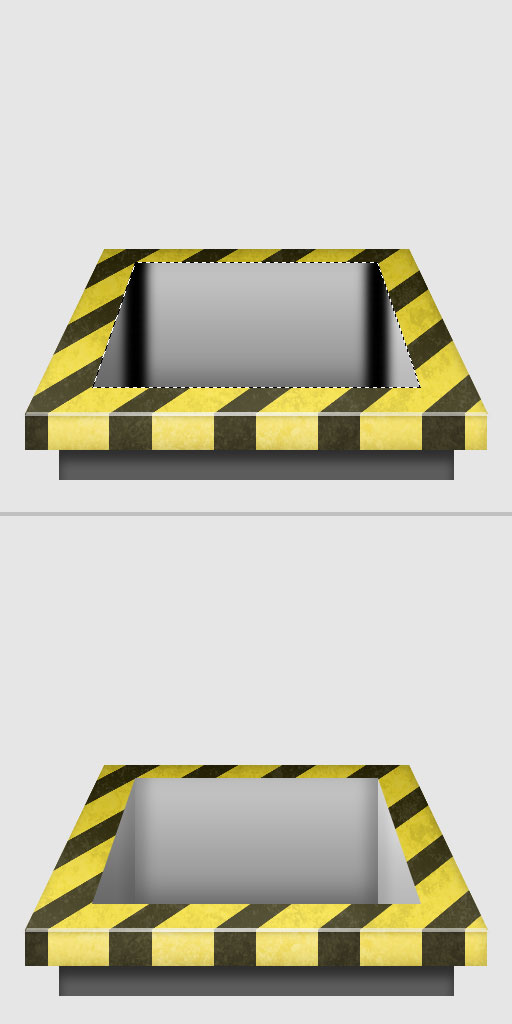
Delete the unwanted part by
ctrl+clicking the thumbnail of
"Face" and
duplicate it ctrl+J, then
deleting the previous layers. You can also use other techniques like simply
Selecting Inverse ctrl+shift+I of the selection and
deleting, or using
layer mask. But the one I’m using also removes the part of the images which is not visible on canvas (outside the canvas area). Set the
Blending mode to Multiply and
Opacity to 80%.
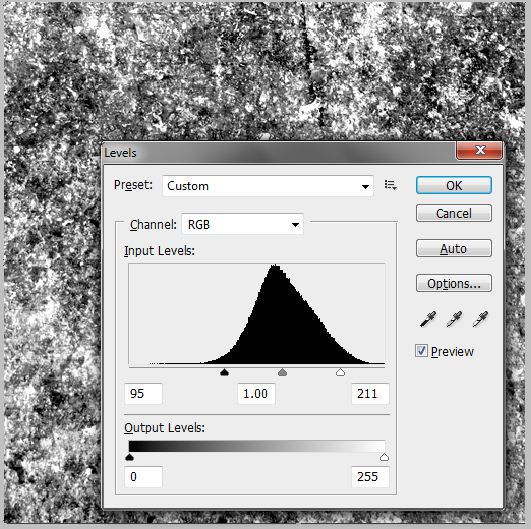
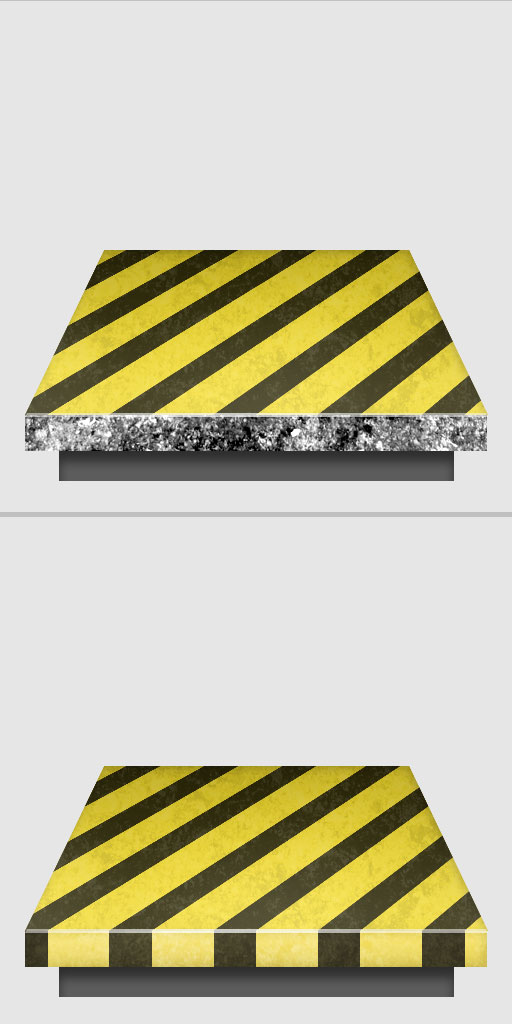
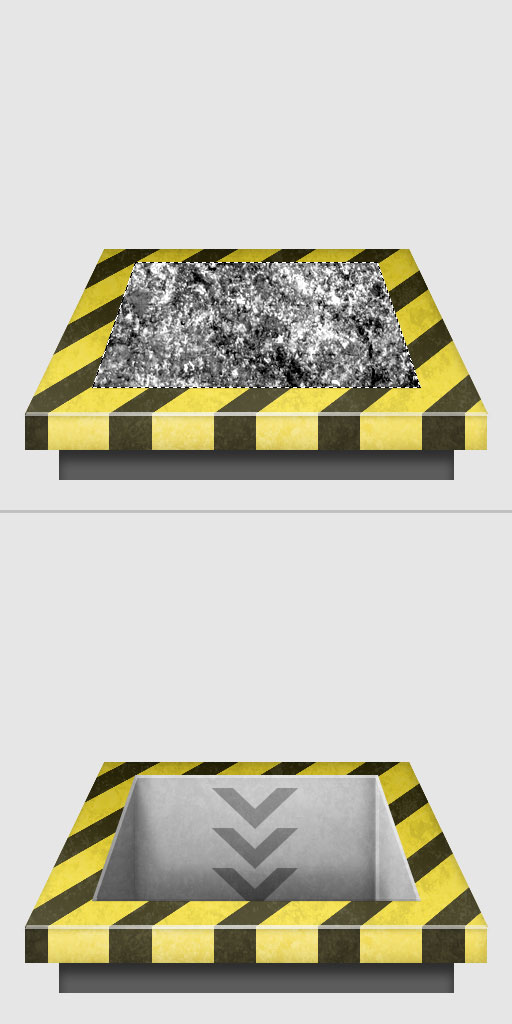
Step 5: Adding Grunge
For this step you need the grunge pack I found on Tutorial9. The link is above. We need something a bit rusty and metallic so let’s go for
"dirtygrungecement08". Import it to Photoshop and choose a small area, somewhere below the center is my favorite part. Make sure it’s big enough.
Copy ctrl+C and
paste ctrl+V it into the icon document.
We’ll prepare the texture by
Desaturating ctrl+shift+U it then go to
Levels ctrl+L and push the sliders inward, like above. This will be our stock texture for later use, so I placed it outside the group and called it
"Texture Stock".
Use the
selection (ctrl+click thumbnail) of
"Face" and
Duplicate the texture layer and bring it above that layer. Set
Opacity to 10% and
Blending mode to Multiply. You can hide the stock texture layer.
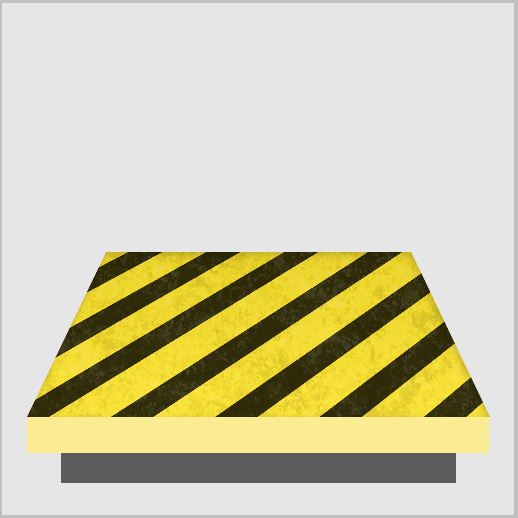
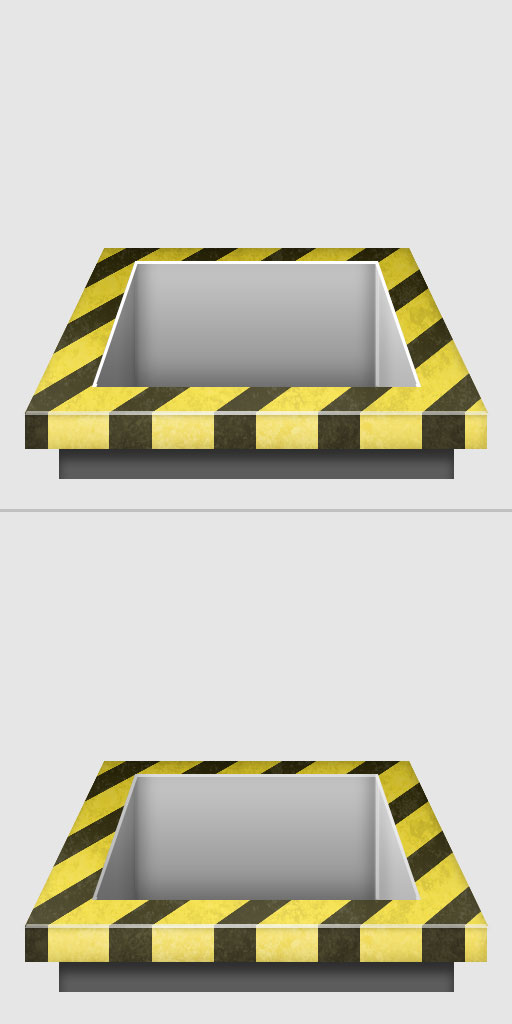
Step 6: Adding Details
Create a
new layer and get the selection of
"Face" then
Fill it with
white.
Nudge it up by
4px the press
delete.
Nudge the image down by
2px. The reason why the edge needs to be so thick is because the icon is very big, so when scaled down the edge needs to be thick to be visible.
Use the
Eraser Tool (E) at
0% Hardness and about
500px in diameter to erase both sides of the edge. Use the tip of the Eraser and
keep the edge fully visible. You may need to zoom out and vary the Eraser size.
Edges
Adding edges, black or white, helps to add contrast between different areas and make the image more realistic.
Create a
new layer and get the selection of
"Face". Use a
soft Brush of a
varying diameter of 400px to brush around the sides with
black and
white. Press
D to reset the foreground and background color to black and white, pressing
X to swap the two colors. Bring down the
Opacity to 20%.
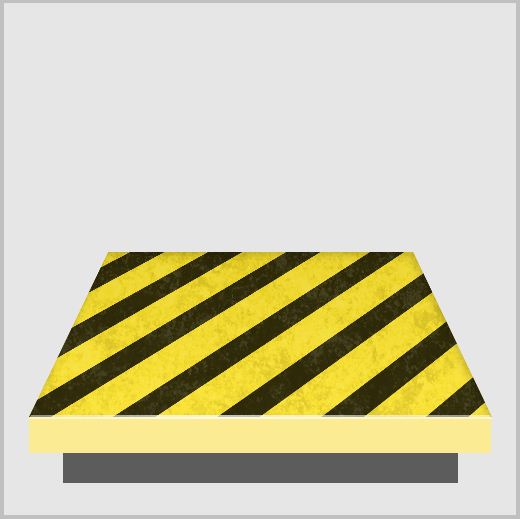
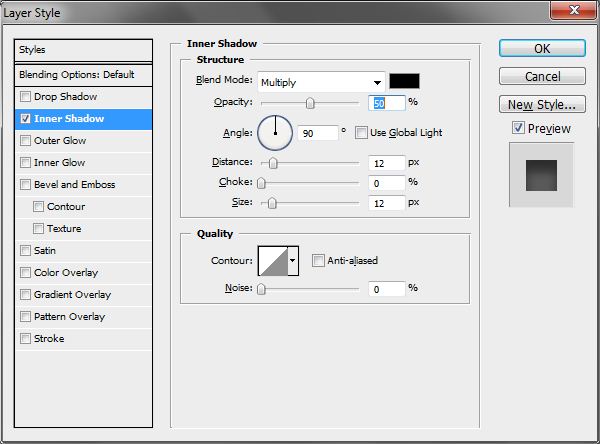
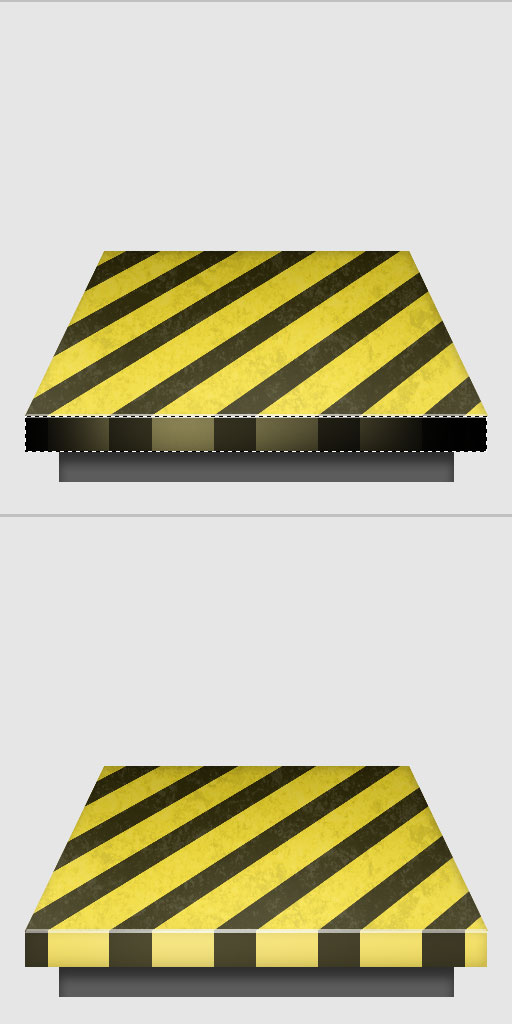
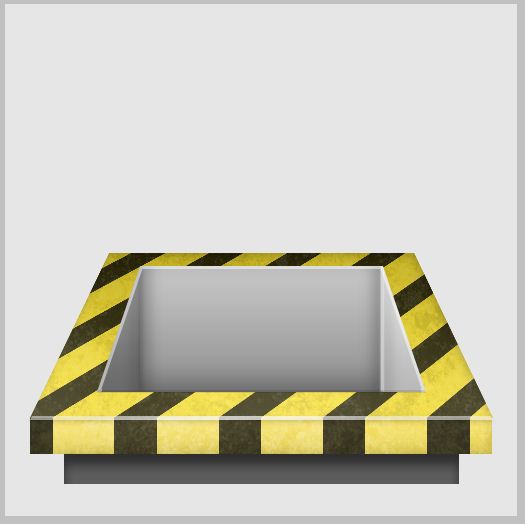
Step 7: Styles For The Bottom
Go to
"Front" layer in the
"Bottom" group and apply the above
Layer Styles. Then apply the following
Layer Style to the
"Front Bottom" layer.
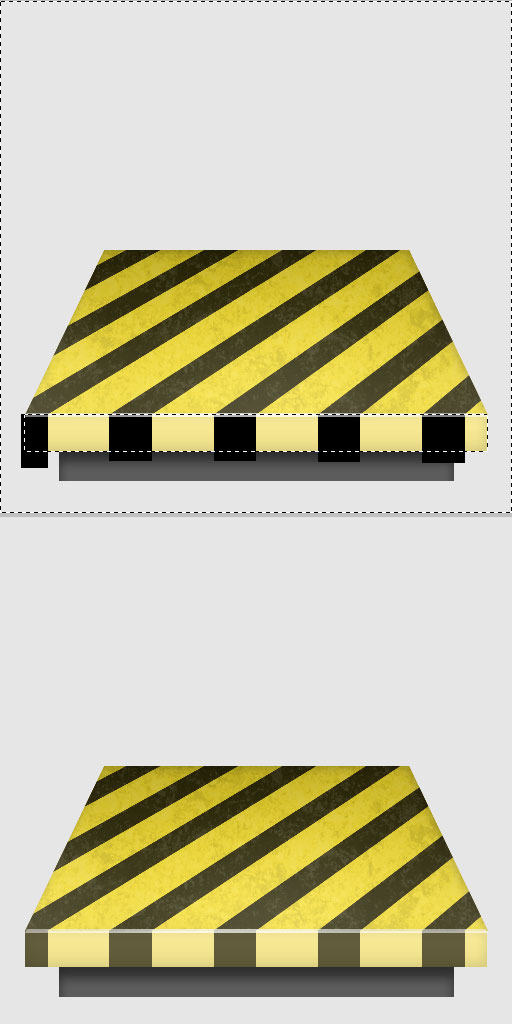
Step 8: More Stripes
Create a
new layer. Use the
Marquee Tool (M) and draw the stripes with
black. Zoom in to make sure the stripes are aligned. Use the selection of
"Front " to remove excess stripes. Set
Opacity to 60%.
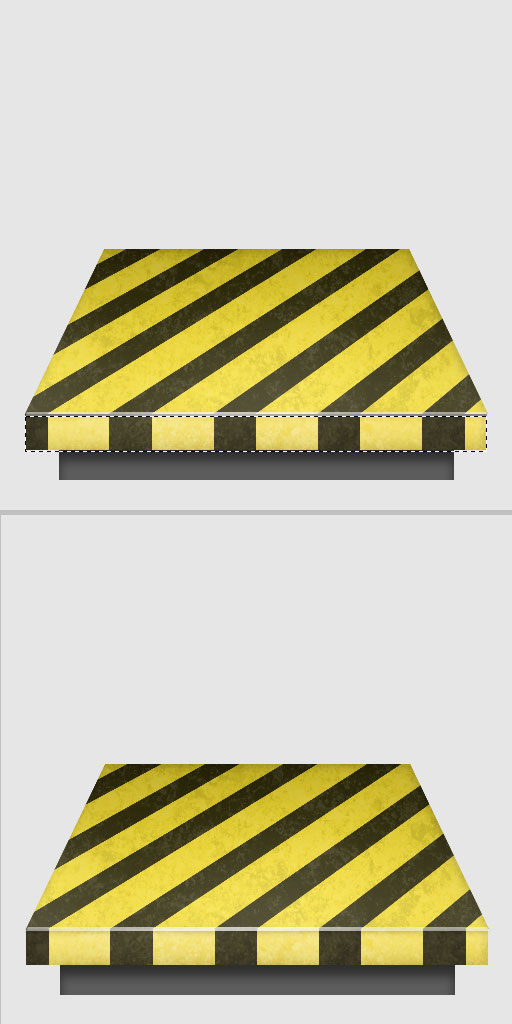
Step 9: Shading and Textures
Create a
new layer and
Brush within the selection of
"Front" at the sides with
black. Make the right side darker than the left. Set
Blending Mode to Overlay and
Opacity to 40%.
Use the process I taught above to create a texture for
"Front" with the stock texture
. Set
Opacity to 20% and
Blending Mode to Overlay.
Create a
new layer. Get the selection of
"Front" and
Fill it with
black.
Nudge the selection down by
2px and
delete, then apply a
2px Gaussian Blur,
Filter > Blur > Gaussian Blur.
Nudge it down by
1px and set
Opacity to 20%.
This is a technique used to make edges pop and look more contrasting even though the effect is subtle.
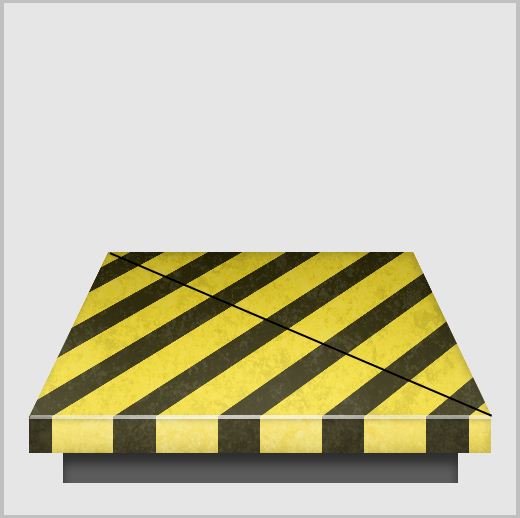
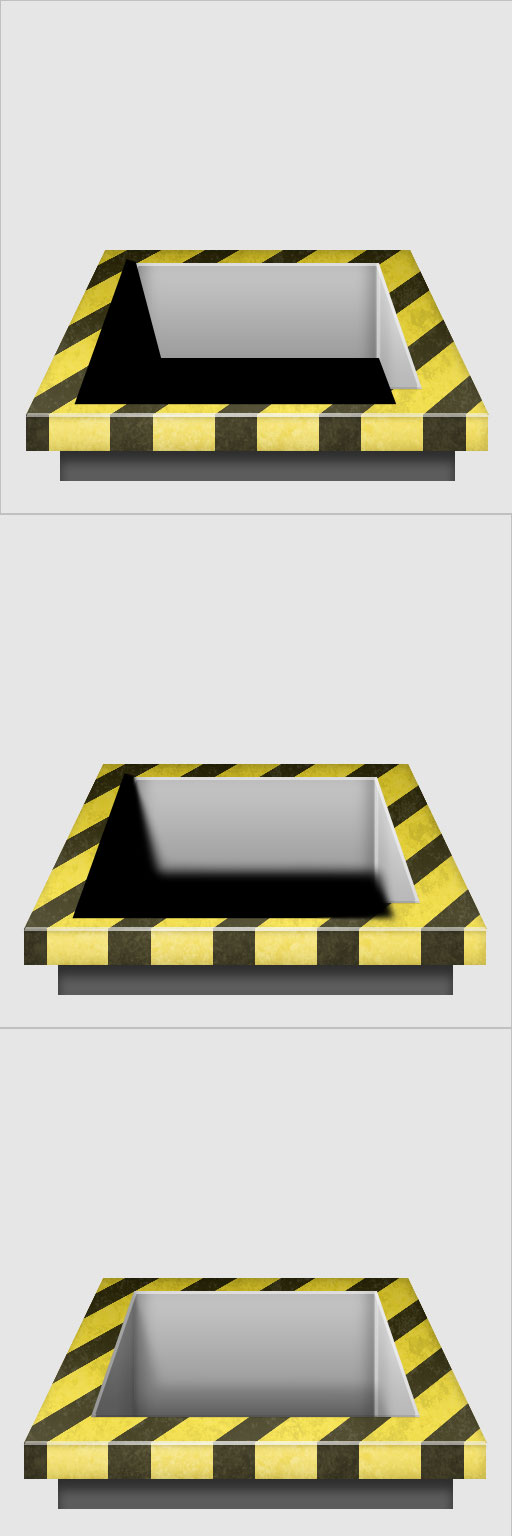
Step 10: Creating The Hole
Create a
new group called
"Inside". Create a
new layer inside and select the
Line Tool (U) with
2px Weight and
black in color. Draw a Diagonal line from one corner to the other end. When drawing the inside, make the corners intersect with the line.
Create a
new layer and draw a
rectangle with
#b7b7b7 in the
center. After this I’ve place two
guides above and below the rectangle for convenience. Draw one triangle on the left using the
Polygonal Lasso Tool (L) and
Fill it with
#848484. Duplicate that layer and increase the
Lightness by 80 ctrl+U.
Flip it Horizontally by
Free Transform > Flip Horizontal and place it on the right.
Name those layers according to their position i.e.
"Left", "Center", "Right".
Copy the following
Layer Styles to the three layers.
Apply the following
Layer Style to
"Center".
Step 11: Shading The Inside
Create a
new layer and get the
selection of all
three previous layers. Do this by holding down
Shift while getting a new selection. Use a
black soft brush with
30px diameter and brush the two corners of the inside. Set
Opacity to 10%.
Step 12: Adding Details
Create a
new layer called
"Left Corner". Get the selection of
"Center" and
Fill it with
black. Nudge it
2px to the right and press
delete. Apply a
2px Gaussian Blur and set
Opacity to 30%. Create a new layer called
"Right Corner" and do the same thing to get a
white line on the right side. But this time use
1px Gaussian Blur and leave
Opacity at 100%.
Get the selection of
"Left, Center, Right" and
Select Inverse ctrl+shift+I. Then use it to delete extra pixels on
"Left Corner" and
"Right Corner". From now on when I refer to
the three layers, I’m referring to
"Left, Center, Right".
Create a
new layer and get the selection of
the three layers then
Fill it with
white. Go
Select > Modify > Contract and key in
3px and hit enter. Press
delete and shift the selection down by
3px then
delete again. Set
Opacity to 50%.
Create a
new layer and get the selection of
the three layers then
Fill it with
black. Shift the selection up by
3px and
delete.
Nudge it down by
1px and set
Opacity to 10%.
Create a
new layer. Use the
Polygonal Lasso Tool (L) to draw the shape above and
Fill it with
black. Use the
Blur Tool and brush the area as shown above using
100% Strength. Remove the area outside
the three layers using the process we used above then set
Opacity to 16%.
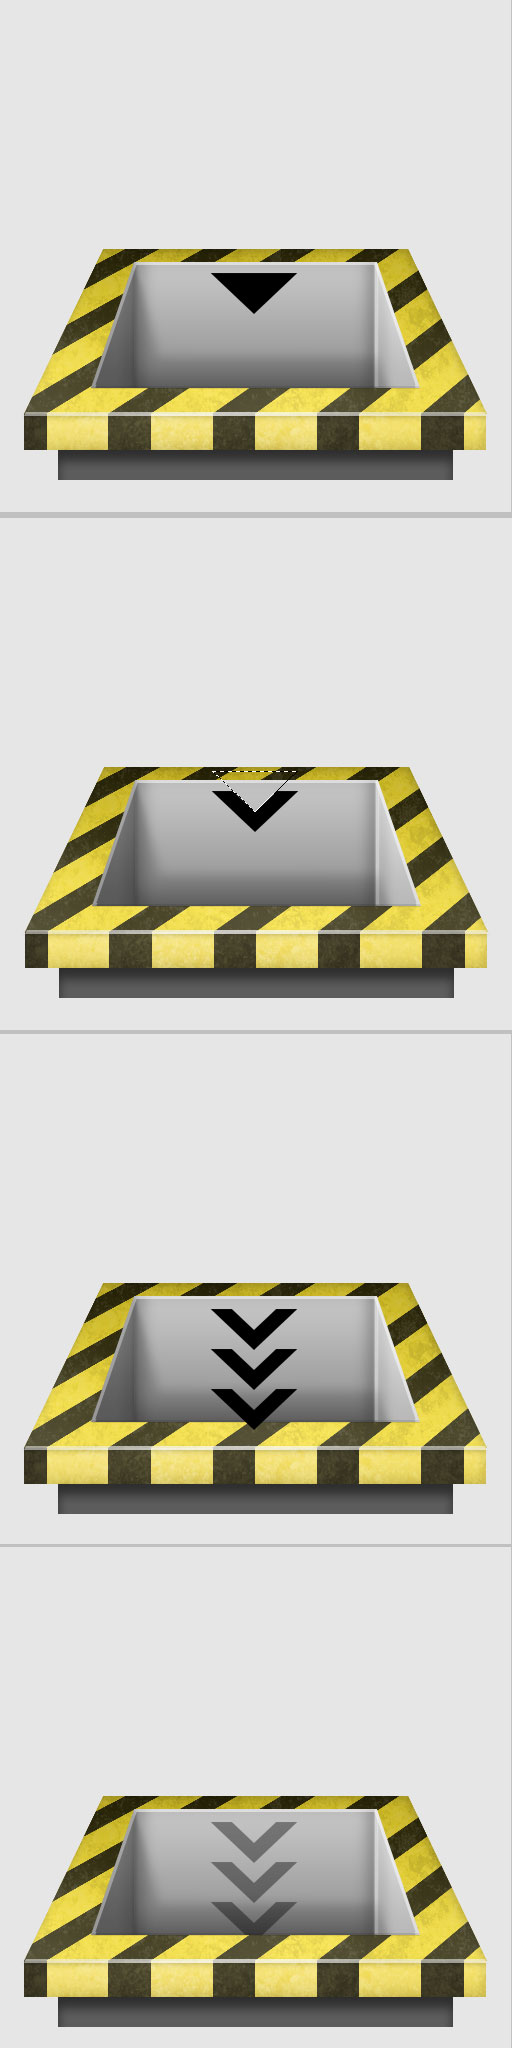
Step 13: Giving More Impact
Create a
new layer and use the
Polygon Tool (U) to draw an upside-down triangle.
Resize and
position it in the center like show above. Use the selection of the triangle to
delete a portion (about 20px above) of the triangle.
Duplicate it and move it about
40px away.
Merge ctrl+E the layers together and set
Opacity to 40%. Use
the three layers to remove the area that is outside it.
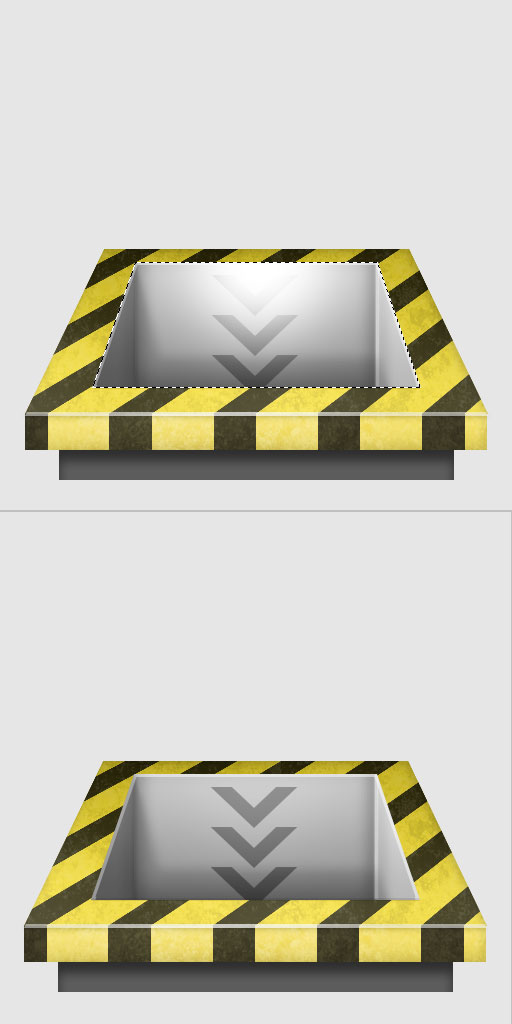
Create a
new layer, get the selection of
the three layers and brush the top center with a soft
white Brush at
200px diameter. Set
Opacity to 20%.
Use
the three layers selection to
Duplicate the
Texture Stock and put it above the previous layers we were working on. Set
Blending Mode to Luminosity and
Opacity to 5%.
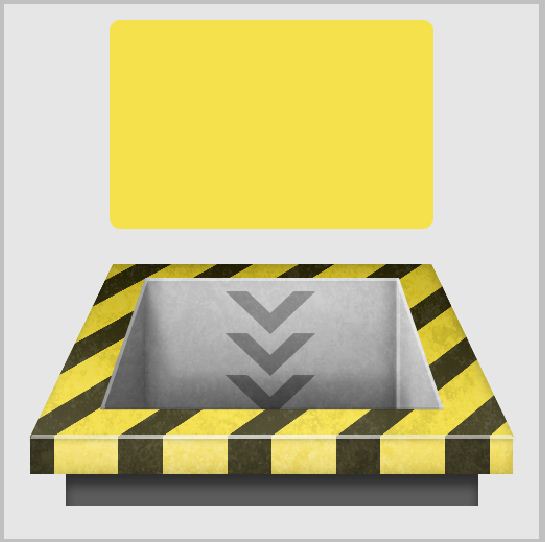
Step 14: Drawing The Board
Create a group called
"Board" and a
new layer inside called
"Board". Draw a
Round Rectangle (U) with
10px radius in
#f5e14b at the center. Then apply the following
Layer Styles to it.
Create a
new layer and get the selection of
"Board".
Select > Contract by 15px then
Fill it with
black.
Contract it again by
10px and
delete. Set
Opacity to 80%.
Step 15: Refining The Board
Create a
new layer and get the selection of the Board.
Fill it with
white then
shift the selection down and right by
2px each.
Delete and set
Opacity to 60%.
Create another layer and get the selection of the Board.
Fill it with
black then shift the selection up and left by
1px. Set
Opacity to 40%.
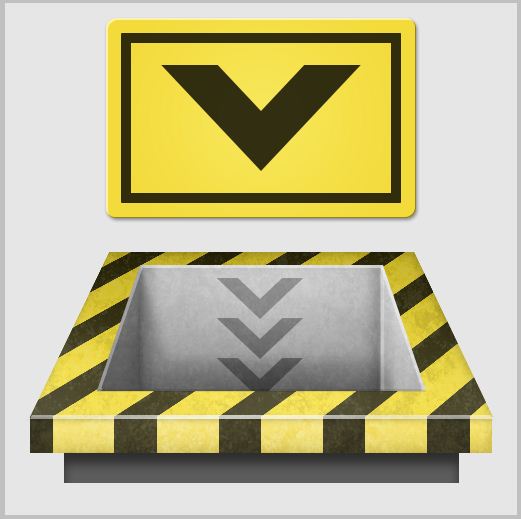
Create a
new layer for the arrow. Use the same process we used earlier to draw the arrows.
Center it and set
Opacity to 80%. Try to make it big so it will be visible on smaller resolution.
Create a
new layer and get the selection of
"Board". Use a soft
Brush with
black and white to paint the edges like above. Set
Opacity to 20% and
Blending Mode to Pin Light.
Shadings
Even on flat surface, applying a subtle shade can give the subject more interest.
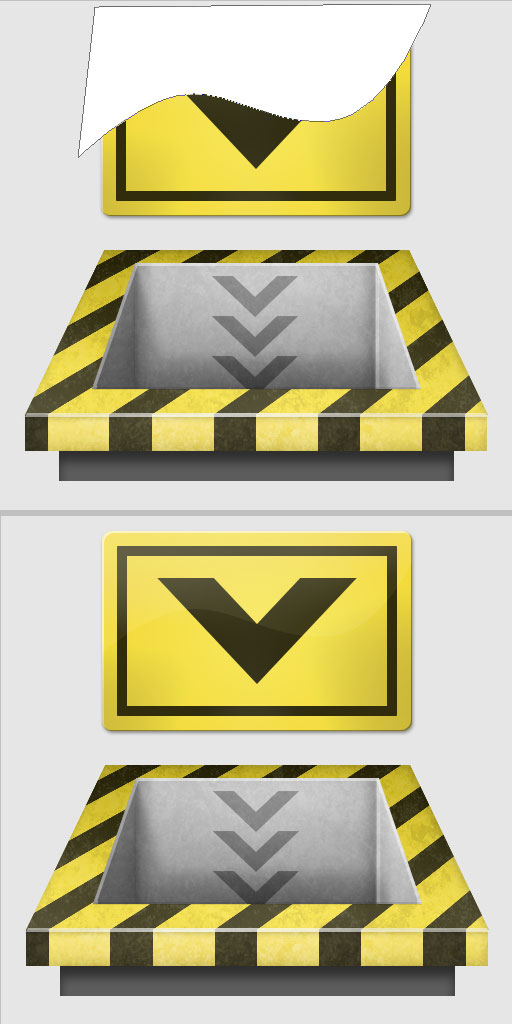
Create a
new layer and use the
Pen Tool (P) to draw the shape above.
Fill it by
right-click > Fill Path with
white. Then remove the area outside the board and set
Opacity to 20% and
Blending Mode to Soft Light,
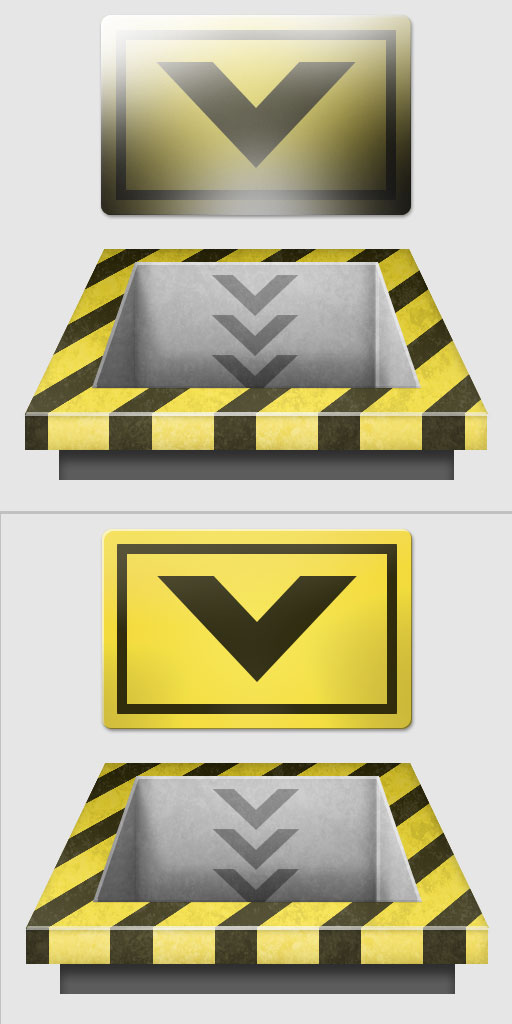
Step 16: Grunge For The Board
Duplicate two Grunge texture from the stock and place one above the other. Set
Blending Mode to Hard Light and
Opacity to 10% for the bottom layer. Apply
Filter > Stylize > Emboss for the second layer with
90 degree, 1px Height and 100% Amount. Set
Blending Mode to Overlay and
Opacity to 40%.
Nicer Textures
Using Emboss on textures can reduce the flatness of the surface.
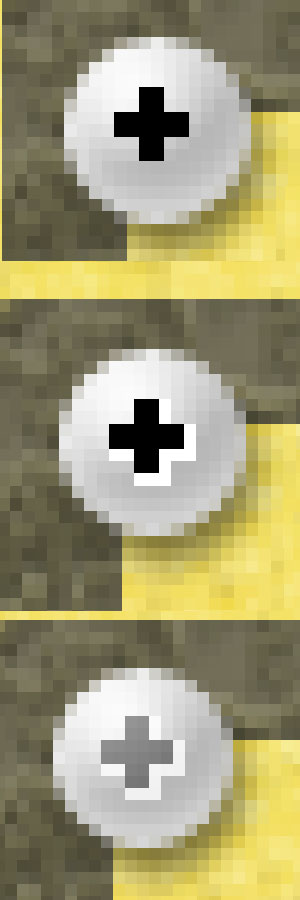
Step 17: Drawing Screws
Create a
new layer and draw one
Ellipse (U) on the left with
#d7d7d7.
Duplicate and mirror it on the right then
Merge ctrl+E the two layers together. Apply the
Layer Styles below.
Create a
new layer and
Zoom (Z) in on one screw. Use either the
Marquee Tool or Line Tool to draw the cross of
2px with
black. Set the
Opacity to 40%. Then
create another layer and draw a
1px edge on the bottom right with
white. Set
Opacity to 80%.
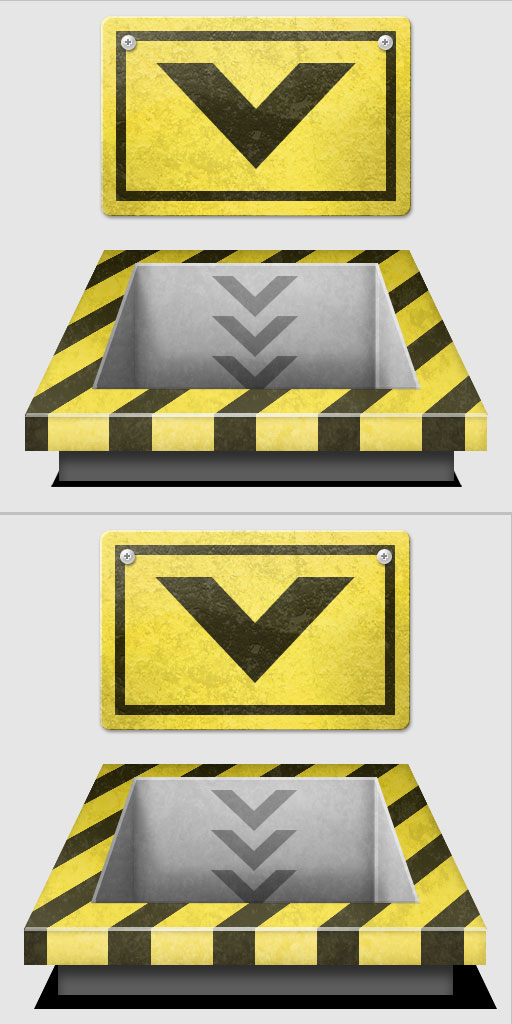
Step 18: Creating The Shadow
Create a
new layer. Get the selection of
"Face" and
Fill it with
black. Bring the layer just above the background layer. Convert it to
Smart Object and
resize it like seen above. Name it
"Small Shadow".
Create another layer and do the same thing, except
without resizing.
Nudge it 10px to the right. Call it "
Big Shadow".
Smart Objects
Using Smart Objects you can easily experiment with different transformation and filters without destroying the original copy.
Apply a
3px Gaussian Blur to
"Small Shadow" and set
Opacity to 70%. Apply a
7px Gaussian Blur to
"Big Shadow" and set
Opacity to 30%. Now you’re done!


 Posted in:


0 comments:
Post a Comment