Showing posts with label Photo Retouch. Show all posts

Friday, 19 August 2011

Effectively Remove Facial Hair in CS5

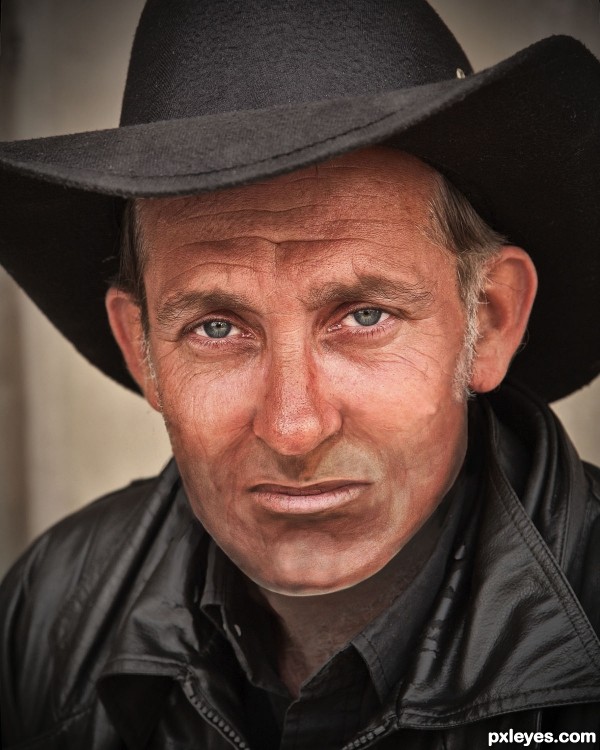
This image was made for the Cowboy Photoshop Contest. The source image was a man with a beard. My idea was to give him a shave by removing the facial hair and adding skin and chin without using external sources.
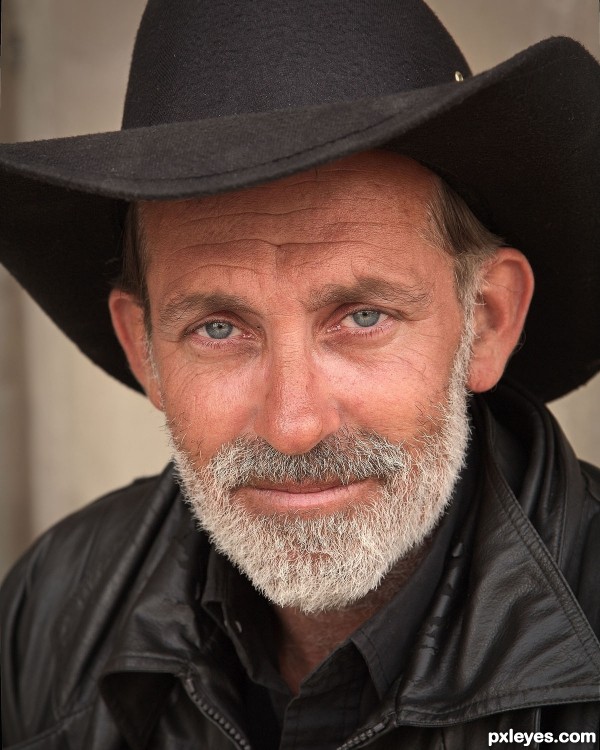
End result:
Effectively Remove Facial Hair in CS5 Final Image

Step 1

This is where I started. The original image.

Step 2

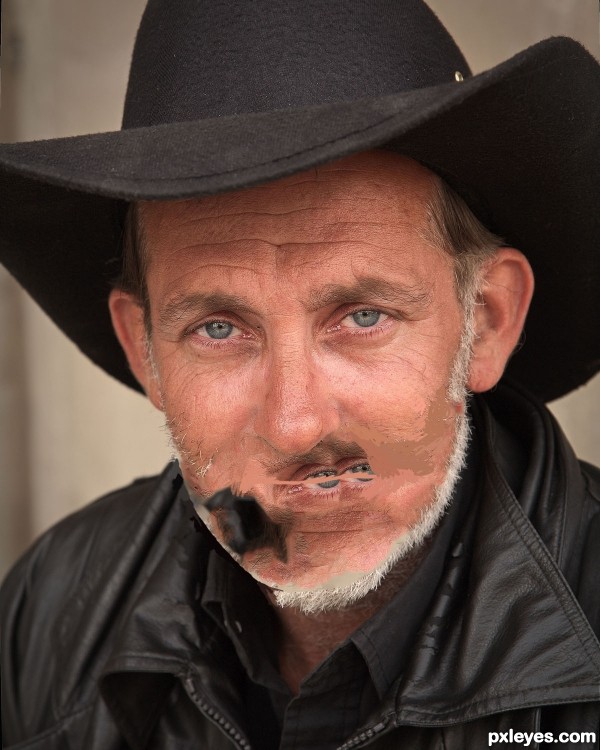
First I used the Content Aware fill to clear the area. It's more funny than useful.

Step 3

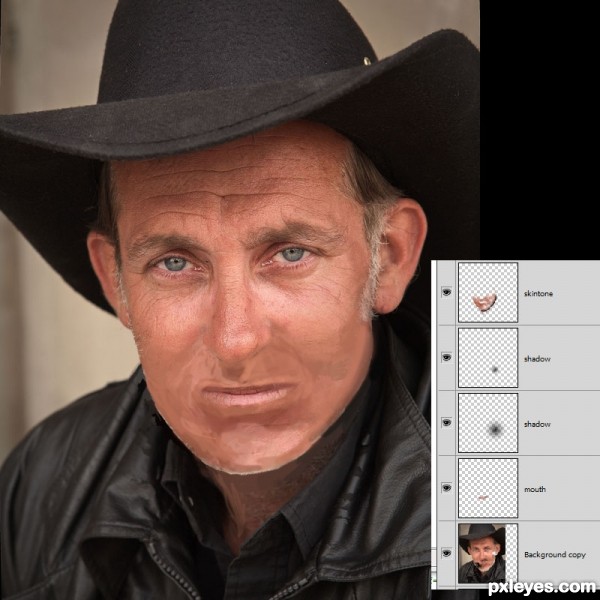
The first quick painting job. I roughly put up some skin tones and brought back the mouth. Basically I used the brush tool and the color-picker while brushing. If the brush tool [b] is active You just simply have to push the [Alt (Option)] key to use the color-picker. While manipulating a face it is allays useful to have a basic knowledge about how to draw a portrait.

Step 4

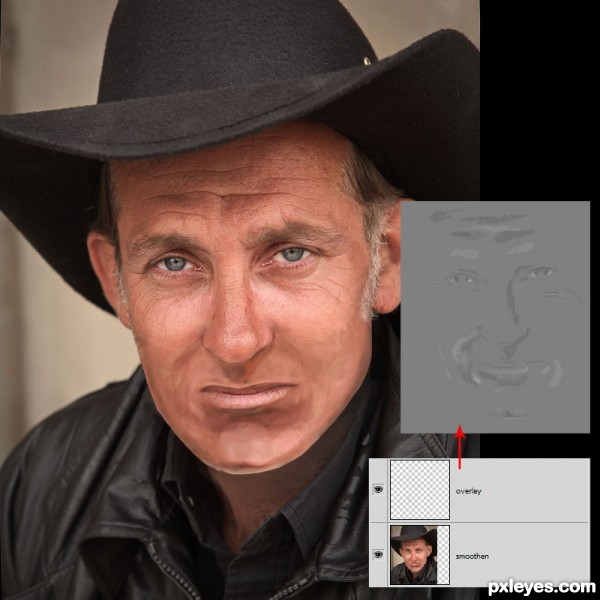
I made things smoother. I used the brush [b] and the smudge tools [r]. If You don't have a wacom pad this phase can be really painful. It might help to use selections at places like the chin where you want sharp edges.

I also used the burn/dodge [o] tool to add some shadows, lights and details. I used this tool set to the midtones range at a very low precent (2-5%) painting several times over an area. The easy way to toggle between burn and dodge is to hold the [Alt (Option)] key while using one of them.

After this I added some more lights and shadows on the entire face with a layer in overlay mode. What overlay does: If the layer is 50% gray (#808080) the layer below won't change at all. If it is lighter the layer below gets lighter if it is darker the layer below gets darker. It's a great way to add lights, shadows and contrast to a picture.
Step 5

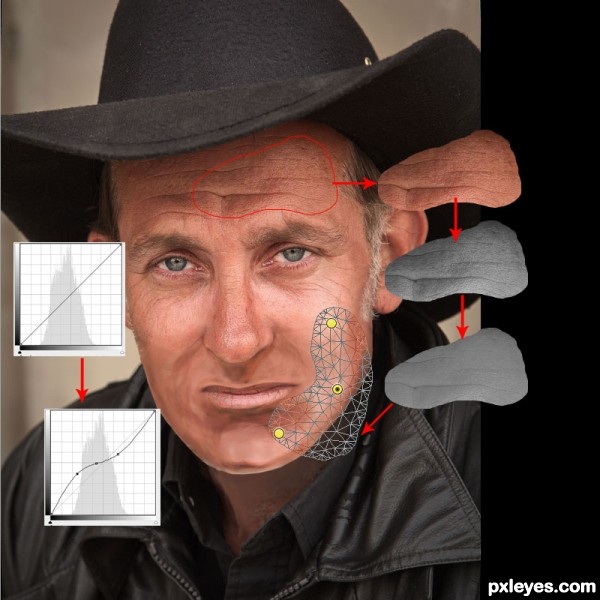
I select an area of the forehead. I will use this for texturing the chin. First I copy it to a new layer [Ctrl (Command) + j]. Then I turn it into grayscale [Ctrl (Command) + Shift + u]. Then I press [Ctrl (Command) +m] to get the curves and I make the layer less contrasty by leaving the midtones, lowering the highlights and lightening the shadows.

I change the layer mode to overlay and use the puppet warp to make the lines of the surface follow the structure of the face.
Step 6

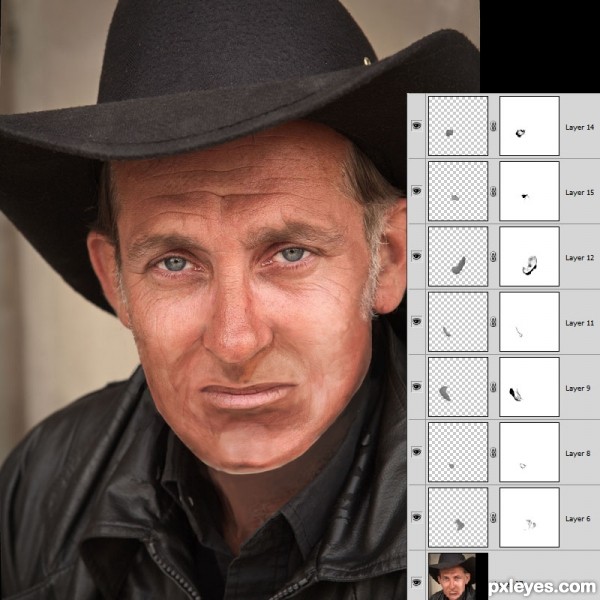
I use the previous technique several times until the whole lower area of the face is textured.
I use layer masks to make the little surface pieces mix smoothly into the picture.
Step 7

Finalizing the image.
What I like to do is to make a copy of the whole image onto a new layer by pressing
[Ctrl (Command) + Alt (Option) + Shift + e]
Then I use some modifier/effect/retouching then change the layer opacity to fine tune it.
Then I start over again with copying to a new layer.

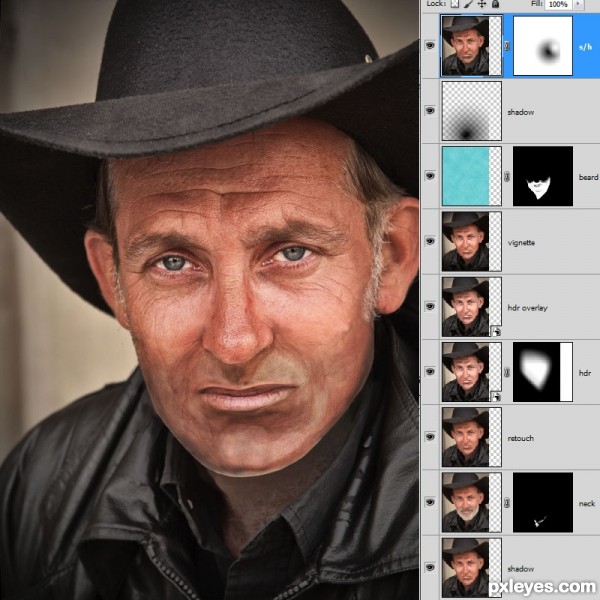
What I did with the cowboy:

Adding some lights+shadow to give it more depth and shape.
Bringing back some of the neck part of the original image.
Retouching / fine tuning the mouth area.
Using a smart object with HDR toning to enhance some details.
Using the same in overlay mode to enhance overall details, make the picture more unified.
Using some vignetting at the edges.
Putting some blueish color over the shaved area.
Putting some shadow on the neck.
Using shadows/highlights to make the whole thing more graphical by lightening the dark areas on the hat and clothes.
Step 8

The final image.

26 Professional Photoshop Retouching Tutorials

Adobe Photoshop is the go-to tool for digital artists when it comes to professionally retouching images. Enhancing and retouching photos in Photoshop is an effective way to "work with what you’ve got".
There are many tips, tricks, and techniques for improving things like skin tone and imperfections, and enhancing the photo subject’s features. This article shares a huge variety of photo retouching tutorials for Photoshop users with brief descriptions of each.

1. Super Fast and Easy Facial Retouching

Super Fast and Easy Facial Retouching

Learn how to improve a poorly taken photograph by reducing its noise in this Photoshop subject-enhancing tutorial. You will also discover a fast and simple way for smoothing out a person’s skin with realistic results.

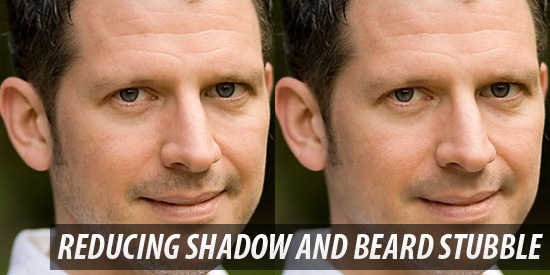
2. Reducing 5 O’Clock Shadow And Beard Stubble In Photoshop

Reducing 5 O'Clock Shadow And Beard Stubble In Photoshop
You can learn how to lower the amount of beard stubbles a person has by reading this excellent Photoshop retouching tutorial. The tutorial covers layer masking techniques, effective usage of the Healing Brush Tool, and layer blending options.

3. Virtual Makeup in a Snap

Virtual Makeup in a Snap
This tutorial goes over an easy method for digitally applying makeup on a subject for a beautiful and realistic outcome. Some Photoshop tools and features used are the Reduce Noise Filter, the Paint Brush Tool, and the Eraser Tool.

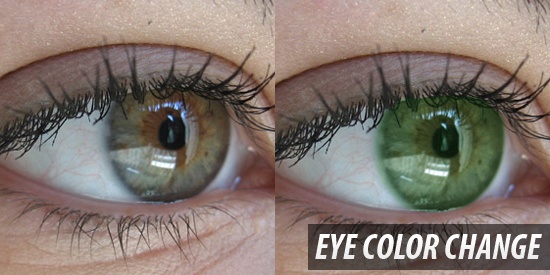
4. Eye Color Change

Eye Color Change
You can use Photoshop to change a photo subject’s eye color by reading through this tutorial that shares a simple method for doing so using Quick Mask Mode and Color Balance Image Adjustments.

5. Increase Breast Size

Increase Breast Size
Learn a technique for augmenting the photo subjects breast size (often used in print magazines) using the Liquify Filter and the Bloat Tool in this quick and easy Photoshop tutorial.

6. Basic Retouch and Colorization

Basic Retouch and Colorization
Learn the basics of photo retouching and enhancing a photos color by way of the colorization method. The Gaussian Blur filter, Curves image adjustment, and the Smart Sharpen filter are just some of the options applied in this Photoshop tutorial.

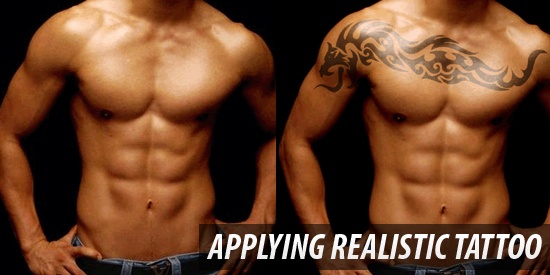
7. Applying Realistic Tattoo

Applying Realistic Tattoo
If you would like to apply a digitally placed tattoo on a subject’s body – perhaps either to cover up imperfections or to make them look badass – this tutorial goes over a method that offers realistic results.

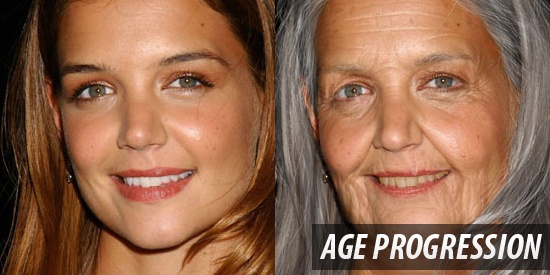
8. Age Progression

Age Progression
Retouching usually aims to reduce aging in someone’s features, but what if you wanted to do the opposite? In this retouching/enhancing tutorial – you’ll learn a method for realistically aging someone’s facial features.

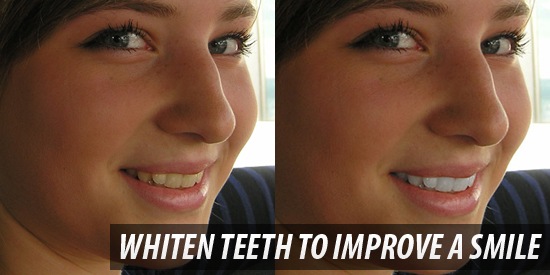
9. Whiten Teeth to Improve a Smile in Photoshop

Whiten Teeth to Improve a Smile in Photoshop
Learn to brighten the subject’s teeth for a pearly-white smile in this Photoshop tutorial that uses the Quick Selection Tool for easy area selection and a Hue/Saturation Adjustment layer to get the job done.

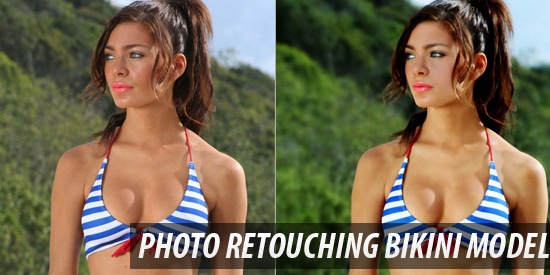
10. Professional Photo Retouching Bikini Model

Professional Photo Retouching Bikini Model
In this tutorial, you’ll learn professional methods for enhancing a bikini model photo. Find several Photoshop techniques such as removing unwanted skin blemishes and a digital airbrushing process.

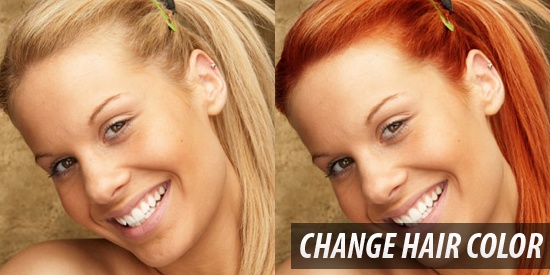
11. Change Hair Color

Change Hair Color
You can enhance a photo subject by altering their natural features. One way to end up with eye-grabbing results is by changing a person’s hair color; this Photoshop tutorial shows you how to do it with basic masking tools and layer styles.

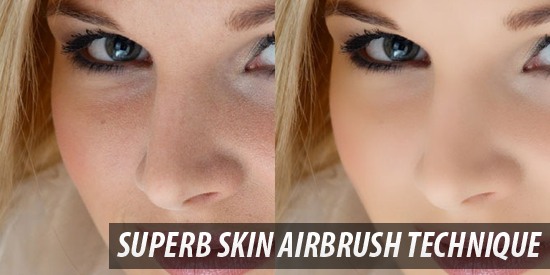
12. Superb Skin Airbrush Technique

Superb Skin Airbrush Technique
Airbrushing is used by professional makeup artists to prepare subjects for photo shoots. In this retouching tutorial, you’ll discover how to perform this process digitally with the help of Photoshop tools such as the Surface Blur Filter and the Paint Brush Tool.

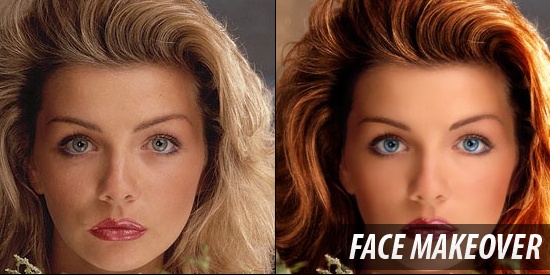
13. Face Makeover

Face Makeover
This professional-level Photoshop tutorial goes over the ways in which you can give someone a full digital makeover, including how to whiten eyes to make the subject look more vibrant, using the Paint Brush Tool in conjunction with lay blending modes.

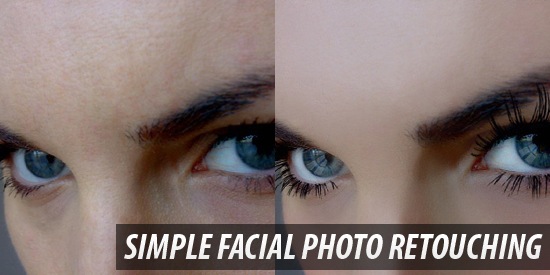
14. Simple Facial Photo Retouching

Simple Facial Photo Retouching
The Spot Healing Brush Tool, the Warp Transform option, and downloadable Photoshop brushes are some of the things this excellent facial retouching tutorial on Grafpedia utilizes to enhance the eye area of the photo subject.

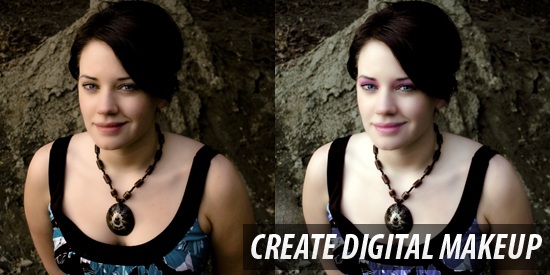
15. Create Digital Makeup

Create Digital Makeup
In this Photoshop photo-enhancing tutorial, you will find out how to apply makeup digitally onto a photo subject using a couple of Photoshop filters, masking tools, and Image Adjustment options.

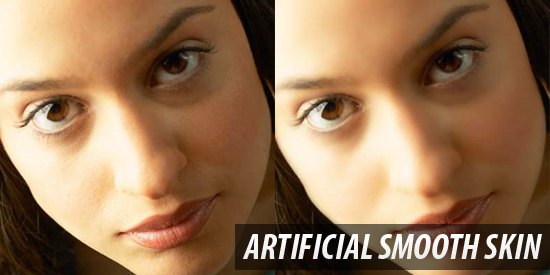
16. Artificial Smooth Skin

Artificial Smooth Skin
This quick and easy beginner level Photoshop tutorial goes over some basic masking methods using the Quick Mask Mode and the Paint Brush Tool to smoothen a person’s facial skin for a flawless surface, a technique used in many print magazines.

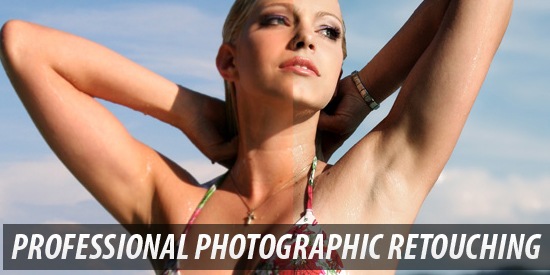
17. Professional Photographic Retouching

Professional Photographic Retouching
In this video tutorial on Abduzeedo, you’ll observe methods that professionals use in order to enhance the subject of a photograph. Color correction, reshaping of body features, and adjusting depth of field are just some of the things covered in here.

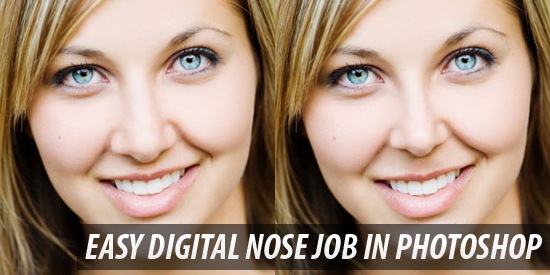
18. Easy Digital Nose Job in Photoshop

Easy Digital Nose Job in Photoshop
This detailed, step-by-step Adobe Photoshop tutorial covers a technique for enhancing a person’s nose. The Lasso Tool, Free Transform, and the Healing Brush Tool are the main Photoshop features utilized in this process.

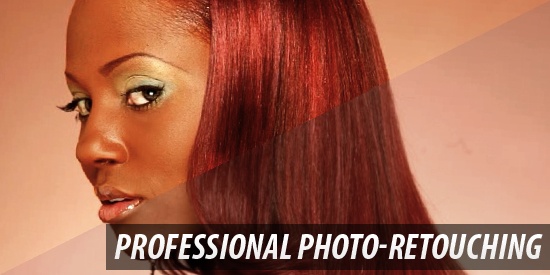
19. Professional Photo-Retouching

Professional Photo-Retouching
In this Photoshop retouching video tutorial, you will get to see a method for digitally adjusting someone’s hair. The tutorial goes over removing unwanted parts of the hair, adjusting tonal values, and working with blending modes.

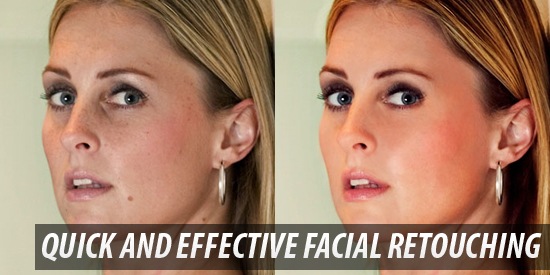
20. Quick and Effective Facial Retouching

Quick and Effective Facial Retouching
What’s great about Photoshop is that you can often get exceptional results in a short amount of time. This step-by-step Photoshop face retouching tutorial goes over how to achieve realistic and impressive results in a matter of minutes.

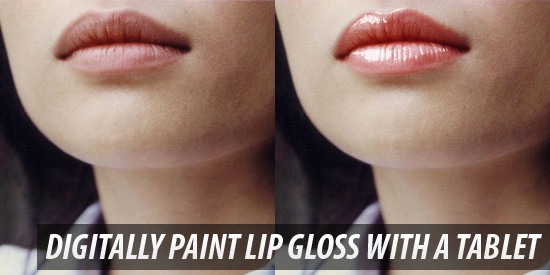
21. How to Digitally Paint Lip Gloss with a Tablet

How to Digitally Paint Lip Gloss with a Tablet
Apply lip-gloss to a photo subject by reading through this Photoshop retouching tutorial that uses the Liquify Filter and Photoshop brush techniques to add some sheen to a person’s lips.

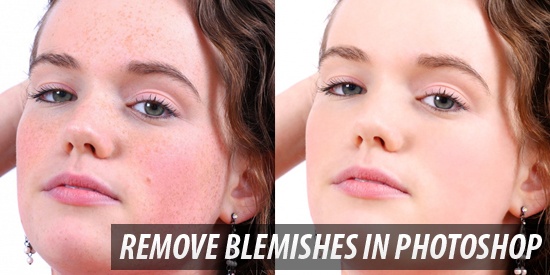
22. Remove Blemishes in Photoshop

Remove Blemishes in Photoshop
The Spot Healing Brush Tool, the Gaussian Blur Filter, and the Paint Brush Tool are the subjects of this easy to follow and highly illustrative Photoshop retouching tutorial featured on Tutorialboard.

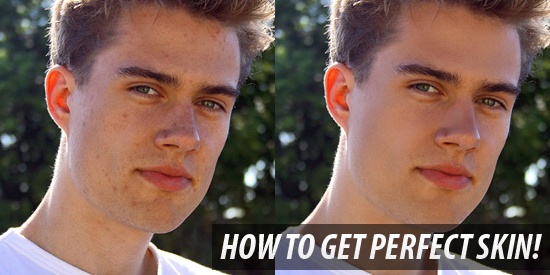
23. How To Get Perfect Skin!

How To Get Perfect Skin!
This easy-to-follow and extremely detailed Photoshop tutorial shows you how to improve a photo subject’s skin features with just two tools: the Healing Brush Tool and the Clone Stamp Tool.

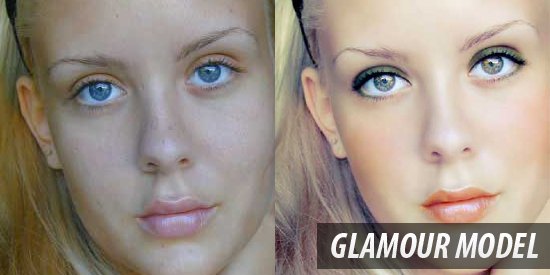
24. Glamour Model

Glamour Model
This photo-retouching tutorial outlines several handy techniques for improving an image, such as taking advantage of the Patch Tool for skin blemishes and using the Turbulence Tool for smooth pixel scattering and for blurring out imperfections.

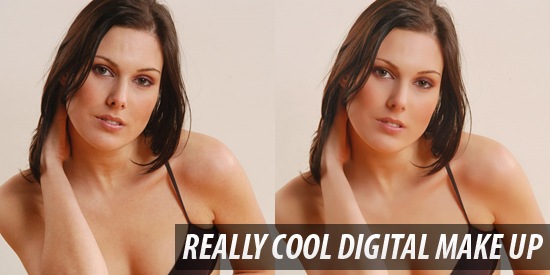
25. Really Cool Digital Make up in Photoshop in 10 min

Really Cool Digital Make up in Photoshop in 10 min
Here is a Photoshop tutorial for applying realistic makeup on photos; it utilizes the Dust & Speckle Noise Filter as a layer mask and Shadow/Highlight Image Adjustments to enhance your images swiftly and painlessly.

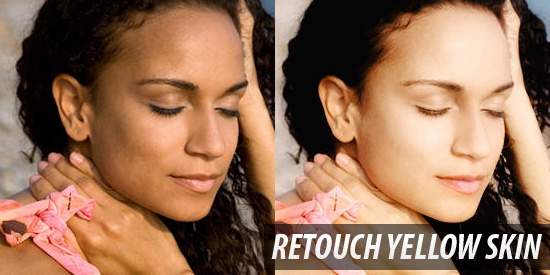
26. Retouch Yellow Skin

Retouch Yellow Skin
You can lighten and soften a person’s skin tone and texture by following along this excellent Photoshop tutorial that uses options such as the Soft Light layer mode, Selective Color Image Adjustments and Curves Image Adjustments.

Got a photo retouching tip?

If you know of a good resource or tip on how to digitally-enhance a photo subject, please share it with the rest of us in the comments. * Edited by Jacob Gube

Wednesday, 17 August 2011

How to Create Mental Sphere

This Photoshop tutorial shows how to create mental sphere and get realistic reflection from environment to this sphere.

Final Image Preview

How to Create Mental Sphere

Resources

Step 1

Open Mountain Photo on Photoshop. Go to Image > Image Size and change width to 1000px and height to 664px.
How to Create Mental Sphere 1

Step 2

Open Yoga Photo and copy it to Mountain Photo. Select Yoga Layer and press Ctrl+T to reduce size of photo like shown below.
How to Create Mental Sphere 2

Step 3

With Yoga layer selected, use the Polygonal Lasso Tool (Feather: 0 px, Anti-alias selected) to select women.
How to Create Mental Sphere 3
Don´t forget that we have some landscape areas inside of selection. Hold Alt button and using Polygonal Lasso Tool deselect those areas.
How to Create Mental Sphere 4
Press Ctrl+Shift+I to inver selection and press Delete button to clear selected area.
How to Create Mental Sphere 5

Step 4

Remove selection with Select > Deselect, then correct brightness and contrast with Image > Adjustments > Brightness/Contrast:
How to Create Mental Sphere 6

Step 5

Select background layer (Mountain). Make round selection with Elliptical Marquee Tool on it.
How to Create Mental Sphere 7
Press Ctrl+J to duplicate selected area to new layer. Select content layer by pressing Ctrl and clicking on thumbnail layer on layers. Load sphere selection by going to Select > Load Selection. Then apply Filter > Distort > Spherize:
How to Create Mental Sphere 8
How to Create Mental Sphere 9

Step 6

With selection still active, create new layer above all layers and fill it with black color.
How to Create Mental Sphere 10
Apply Filter > Render > Clouds to this layer.
How to Create Mental Sphere 11

Step 7

Apply Filter > Distort > Spherize.
How to Create Mental Sphere 12
How to Create Mental Sphere 13

Step 8

Change layer mode to Screen and lower opacity to 57%.
How to Create Mental Sphere 14

Step 9

With selection still active, create new layer above all layers and fill it with black color.
How to Create Mental Sphere 15

Step 10

Deselect area with Ctrl+D an update layer opacity to 0%. After that go to Layer > Layer Style > Inner Glow and apply style with following settings:
How to Create Mental Sphere 16

Final Image

How to Create Mental Sphere
This tutorial is now complete. Hope you liked it!

 
Design by Wordpress Theme | Bloggerized by Free Blogger Templates | coupon codes